Using Linux opens a world of high quality and robust Open Source projects which you can use to make things happen. Getting a Raspberry PI running in your home network is the first step to Home Automation, it is quite straightforward for anyone with a little interest in computers.
This is a quick start guide to installing Raspbian (Debian Linux for Raspberry PI) onto a Raspberry PI.
Installing Raspbian with Desktop onto a Raspberry PI.
Getting NOOBS Installed
-
Download Noobs.zip
-
Unzip the file, e.g. NOOBS_v2_8_2
-
If using exFAT on the SD card, then delete the exFAT partition and create a FAT32 partition.
-
Put the SD card into the PI, connect to HDMI and boot, select the Raspbian Desktop image and install.
-
Complete the OS install, using the desktop– Set password for the user pi– Setup networking, probably wifi– Access the Raspberry PI Configuration GUI by accessing the Raspberry icon -> Preferences -> Raspberry PI Configuration
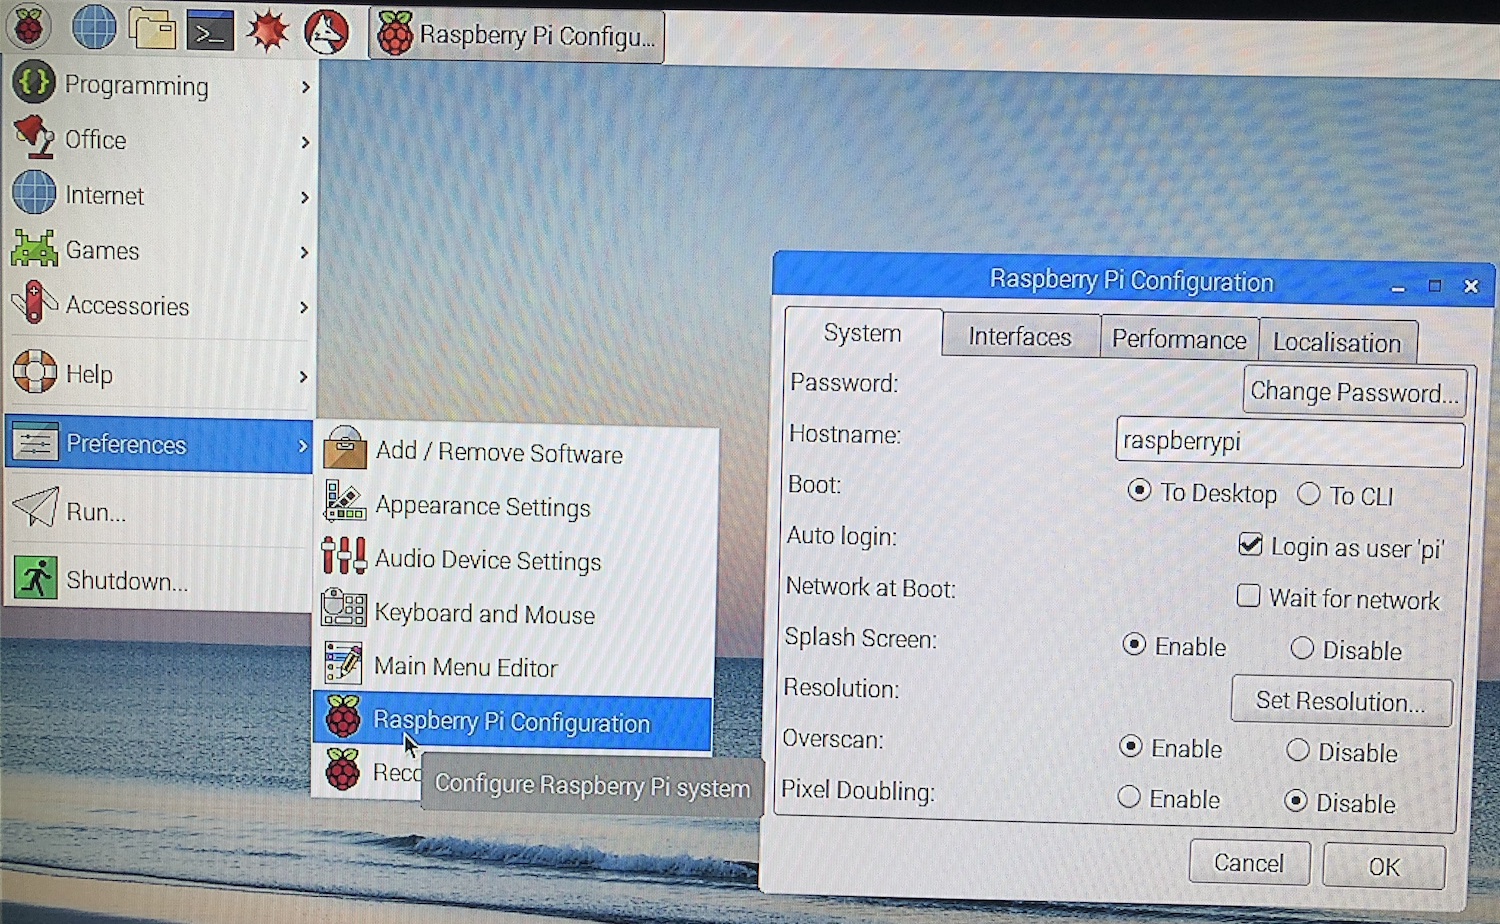
- I suggest the following system settings
– setting the hostname
– Adjusting the screen resolution
– Disable overscan (this will depend on your TV/monitor) - The following interfaces settings are important
– Enable SSH - Save your changes by clicking on OK
- Reboot when prompted
Accessing your Raspberry PI
Give the pi a known IP address, some decisions to make, easiest would be use your home network device to reserve an IP address using DHCP, that way the device can be easily changed later. To make it a static IP you will find a few good references
TODO references to articles on making up static
SSH to Your Raspberry PI
Now you can use SSH to access the PI and complete the rest of the changes.
Linux Ready for Home Automation
Additional Setup for Raspbian,
This may or may not be required.
Install some missing useful things
sudo apt install dnsutils
Disable IPv6
If you are having odd networking problems, this can sometimes be because Linux fully supports IPv6 but your home network probably does not.
Edit /etc/sysctl.conf, add the following to the top of the file.
# added by Keith 7 October 2018
net.ipv6.conf.all.disable_ipv6 = 1
net.ipv6.conf.default.disable_ipv6 = 1
net.ipv6.conf.lo.disable_ipv6 = 1
Save and exit the file. Then run the command
sudo sysctl -p

Recent Comments